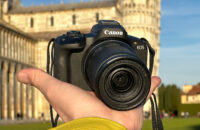
Do you really know all the tricks to make your iPhone 6 even better camera? Are you aware that it cannot work properly without an additional application? Or that your life will be much harder without knowing the magic of HDR? I have prepared a detailed list of everything you should know to make your iPhone 6 photos perfect…
I must admit: for a long time, I was really rather sceptical about smartphone photography – you cannot really beat the laws of physics: small sensor and small lens prevent miracles from happening. I was a fan of Samsung and was forced by circumstance to switch to Apple (at certain point, Samsung they did not offer anything suitable for me), and thought all the hype about iPhones is rather suspicious.
Yet, I was wrong: the quality of iPhone 6 photos is much better I could ever imagine (in good light, I should stress). I even had several photos printed to a big size and again: was surprised how well it worked.
Also, I tried iPhone 6 for my favourite photo discipline – street photo, and realized that photographers really got an incredibly powerful tool in the Burst mode (I press the Home Button, iPhone 6 makes up to 10 shots per second and offers me a convenient way to select from them).
Google Photos are helping to make the case for iPhone photography even stronger – it has never been so easy to back-up and sort your stuff. So if I sum it up: the impact of all these changes will influence the way photos are taken much deeply than photographers are ready to accept now.
Let’s summarise what you should know about these little gadgets changing the world of photography.
iPhone 6 and Burts Mode – 10 shots per second

Why do I start with this rather “boring” feature? Because I think it to be a bigger revolution than many photographers realise. In fact, many iPhone 6 owners even do not know about it – and it is really simple: you just press the Home button and you iPhone starts “bursting”. Apple says the camera does 10 photos per second, my experiments suggest it could be even more.
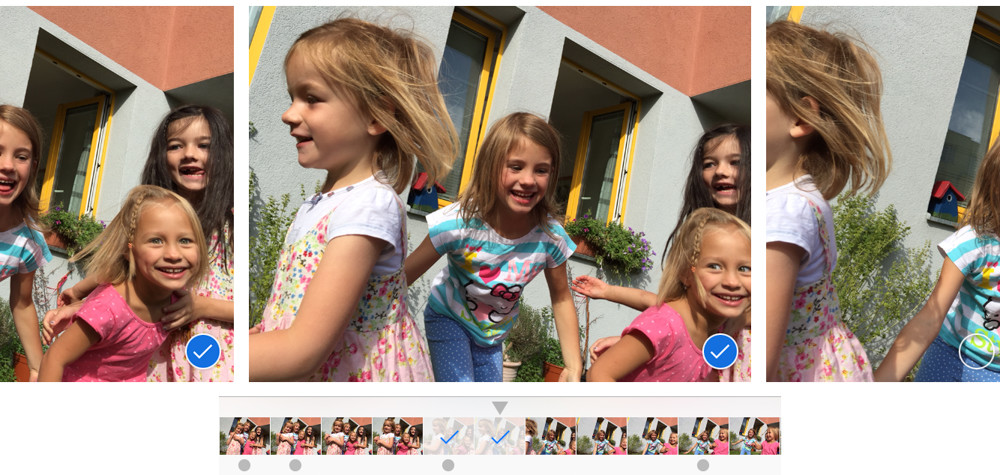
Ability to take some many shots is just a part of the charm. You can do many frames per second on nearly any camera, but it probably drives you crazy to sort them out and delete the obsolete ones. Not here: the system actually stacks the photos under each other, so you can open each of the “bursts” and select only the best once (the rest gets deleted automatically). Great, isn’t it?!
Why am I so excited by the Burst mode? Because it allows me to capture very complicated scenes full of people in motion. And without them noticing they are being photographed… I love taking shots from a very small distance, so pressing Home button allows me “walk” through crowds and then to select only the one or two precious nice shots (out of dozens, mostly.)
Simple functions you must know on iPhone 6
You probably know these little features – but still they deserve to be mentioned in this text. Since I hate reading manuals, it took me several months to learn about some of them.

Open the camera with swiping up locked display. Did you notice the little camera icon in the lower right corner of your locked iPhone 6? Just swipe it up and you get to the app instantly. Just do not be surprised you cannot see any older photos, it is for you privacy sake and you have to unlock you phone completely to access all your photos.
Shoot by pressing a volume button. Volume buttons can be used as an alternative Shutter button. It could help, but requires a bit of caution: pressing the button can shake the smartphone and make the shot blurry (in low light mainly).
Shoot by pressing a headphone volume button. Well, you might never really realise that you can activate Shutter button by pressing the little white buttons on your headphones (provided you did not lose them like me…)
IPhone 6 and exposure controls
Would you guess what is the most common photography misconception I encounter during my photo trainings? Yes, it it the thought that a great camera is enough to guarantee great shots. Yet, what a horror, even the iPhone the Great sometimes produces really bad results (yes, like the one shot against a window…)

So you have to realise that your iPhone 6 is as silly as any other camera and you really have to adjust exposure quite often (eg ask you smartphone “to shoot it lighter or darker than it originally wanted”).
“Normal” cameras has a exposure compensation function (mostly activated by a dial or a combination of a button and a dial). IPhone has its own solution which works really great. In fact, you have three options how to adjust the exposure during shooting.
Option one: You surely noticed the yellow square that appears on you display after you touch it for a second or so. If you swipe up or down the line with a little sun besides the square, you can control how dark or light the final shot is. That’s really easy!
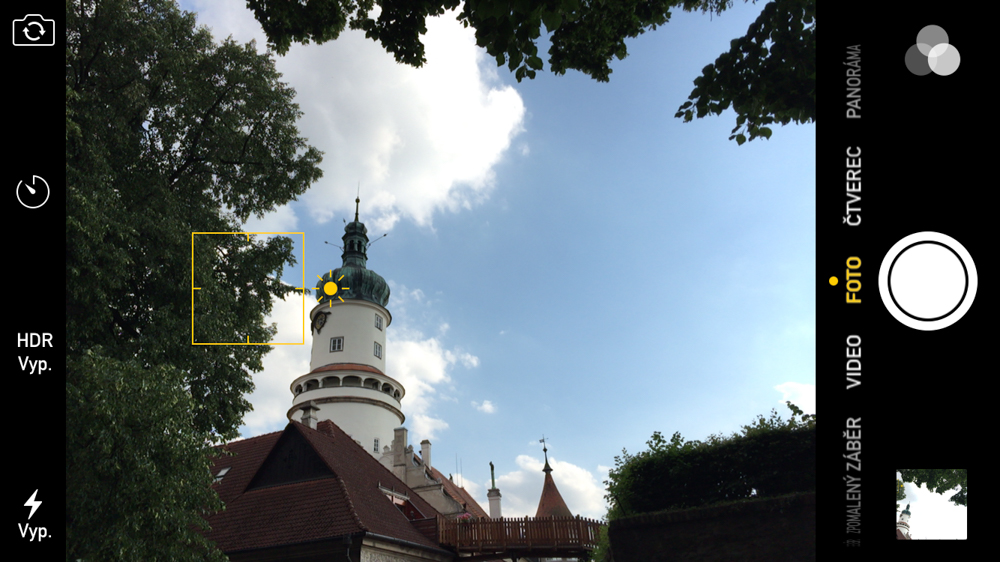
Option two: You do not actually have to move your finger along the yellow line. Just tap into the scene on your display – to the part of the shot you wish to be well balanced.
For example: most common mistake occurs during any shot including sky. The bright sky overweights darker parts which often all but disappears. So just tap somewhere to the lower part of the shot, to – say – grass. And yes, the photo gets more balance. Well, the sky can be too bright now, but overall the result would be better. This technique requires a bit of experimenting, but works really great. Just try its and soon you’ll be asking yourselves how could you have lived without this…
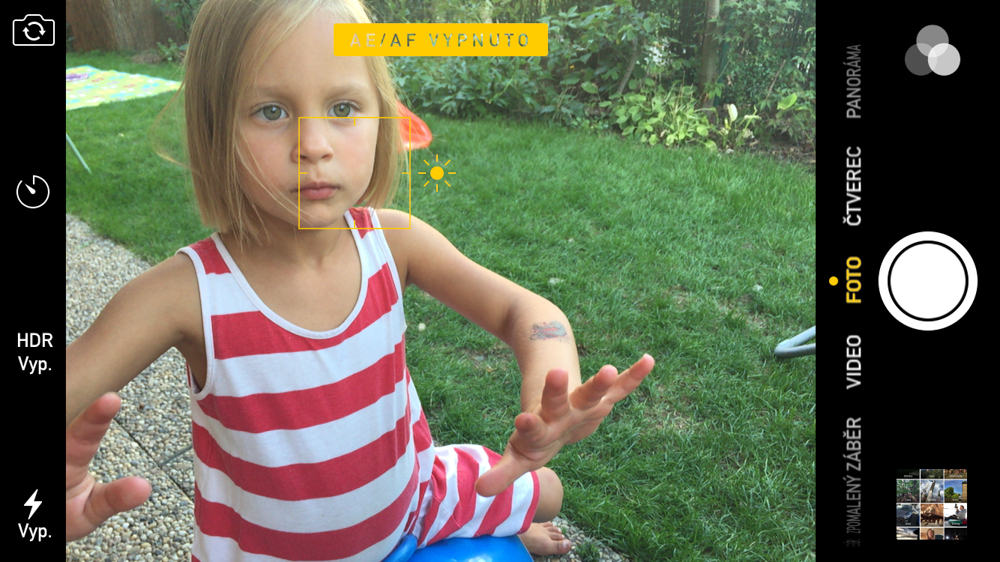
Option three: learn to lock exposure and autofocus. Even experienced user might not know this feature – just keep you finger on the screen a bit longer. The yellow square gets bigger and sign AE/AF LOCK appears. From this moment, the exposure setting and autofocus will not change even if you point your camera to another side…
This could be useful for, say, shooting indoors when we do not want to have exposure broken by light from window. We could lock the exposure and focus on somebody and them change the angle without risk of being overpowered by the outside light. All this sounds great, but, frankly, the option two works somehow better in real life…
Why you have to buy an app for your iPhone 6
Even the toughest Apple fans must be ready to accept that “Android smartphones” are much better in one single important detail: their default camera apps offer the control over ISO settings. And even if majority of photo taking folks have no clue at all what ISO means, to put it simply: you just cannot life without it.
In fact, it is something hard to understand: Apple is trying to convince people that iPhones are smart enough to avoid nearly all settings and that its automatic algorithms can handle everything.
But it is not – a qute likely will never be – true. And you have to be able to fix the problem by buying additional app or apps. And admit that full auto regimes could really be dangerous.
Let’s explain this in detail – since this really matters.

Meet my daughter Anna who obviously loves swings. But on this iPhone photo, she is blurred. You have encountered this probably thousand times before – I mean the situation when your beloved iPhone 6 just cannot take a decent sharp photo of a bike in a forest, child running in a café or a girlfriend dancing on a summer party.
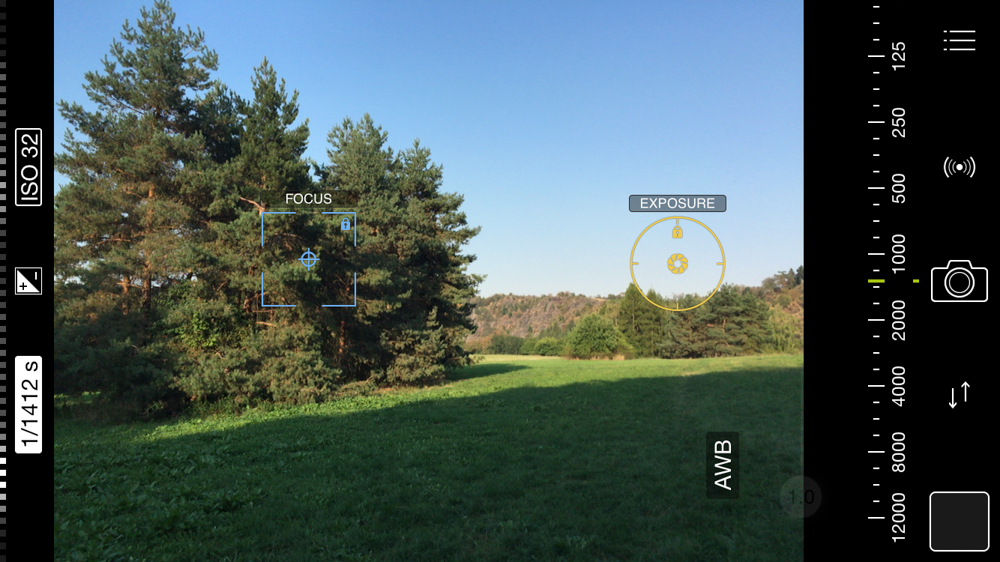
How come?! What happened?! Because no camera under the sun can handle this situation, even the best one costing like a slightly used car. All these situations have one thing in common: we are trying to capture relatively quick movements in relatively low light. There is just no way iPhone can understand that the movement is involved – and settles for a relatively long exposure time. In this particular case iPhone 6 set ISO (sensitivity) to only 32 and used exposure time of 1/40 of second. Which is long enough to allow Anna to move by a couple of inches. And blur the shot.

How to fix it? You have to accept that iPhone 6 just cannot handle it and invest a couple of dollars into an app allowing to manually rise ISO. Just look at the second shot – I used my favourite App ProCamera (see below) and “made” iPhone to use ISO 500. Just by doing this I forced smartphone to use much shorter/quicker time 1/750. And Anna is suddenly frozen in movement. Great!
To put it simple, there is no way to avoid understanding ISO and its function for making a good shot. I suggest you do some more reading about this and for now, just trust me a accept a simplified, but completely correct law: if you are shooting a movement in low light, by rising levels of ISO you are giving iPhone 6 (or any other camera) a command: use quicker time and do not blur the photos!
When I started my photography trainings a couple of years ago, I was joking that kids should have learn this simple rule about exposure time and ISO at grammar school. Now it is not joke anymore – they really should! World of photography would be much nicer…
Best photo apps for iPhone 6
Right, so we concluded that you have to buy an app, because without ability to fiddle with ISO, you can hardly make good photos in low light.
So what are the best photo apps for iPhone 6? I checked many of them, but finally my list has only one winner.
ProCamera (link here)
If you buy ProCamera, for a couple of dollars you can get pretty much everything you need and much more, since you actually do not need many features. The key to your success is an intuitive ISO setting. Which just works great in ProCamera.
My workflow is very easy with this app. In low light, I just set higher levels of ISO (try not to go further than to 500, that the noise becomes visible and quality of photo really lower). Then I can in de facto manual regime by quick taping adjust proper exposure time. (You cannot change aperture in iPhone, its fixed at 2,2). And that’s it.
Obviously, Pro Camera can do much much more, sometimes I adjust the White balance as well – it works great since you can see different options directly on the display. Just select whatever setting you find most reasonable.
Besides this, you can use this app for other really great advanced tricks, such as to split area of focusing and exposure locking (see the photo).
Frankly, you will probably not use these options much, neither I do it. I am trying to avoid shooting in situations with artificial light, because the photos will be ugly anyway, so no need to play with White Balance. Similarly, the split focusing looks great, but it is probably safer and quicker to use some easier workaround…. So the only important reason why to switch to this pas is… ISO.
There are many other great apps – for instance, I tested and quite liked Manual and Camera+, but nevertheless ProCamera is my winner. (If you have your own favorites, let me know in comments!)
One more best iPhone 6 app: Pro HDR X
You might have noticed that I can see deeply into your mind – I know how many times were you angry that you camera cannot capture something as basic as a biker in woods in late afternoon (why this happens, see text above). There is one more situation which tortures you: if you want to take a shot of your flat, you either see the flat (and windows overblown with light), or outside scenery (with flat completely dark). Or you are on vacations and you are (without success) trying to capture both old church and sky above it. It is just impossible to achieve, isn’t it?
To fight this endless battle, you have to pick up another important abbreviation: HDR. High Definition Range, to put it simply, allows you to overcome the inability to capture both bright sky and much darker church under it – and pretty much anything with a huge difference between lights and shadows by – you guessed it – making its definition range higher.
The core of this technology is simple: in order to overcome the big difference, camera/smartphone makes three or more shots and then combine them into one. It is really essential to have at least basic knowledge of the HDR principles. Without it, many quite ordinary scenes (such as a dark church and bright sky) will remain off limits.
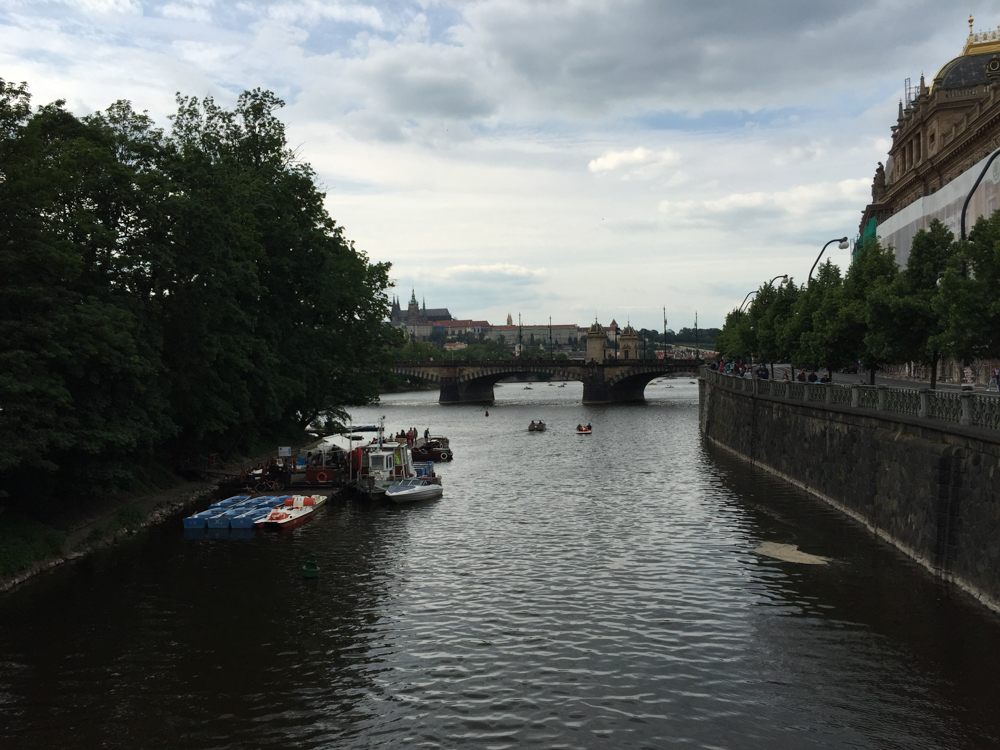
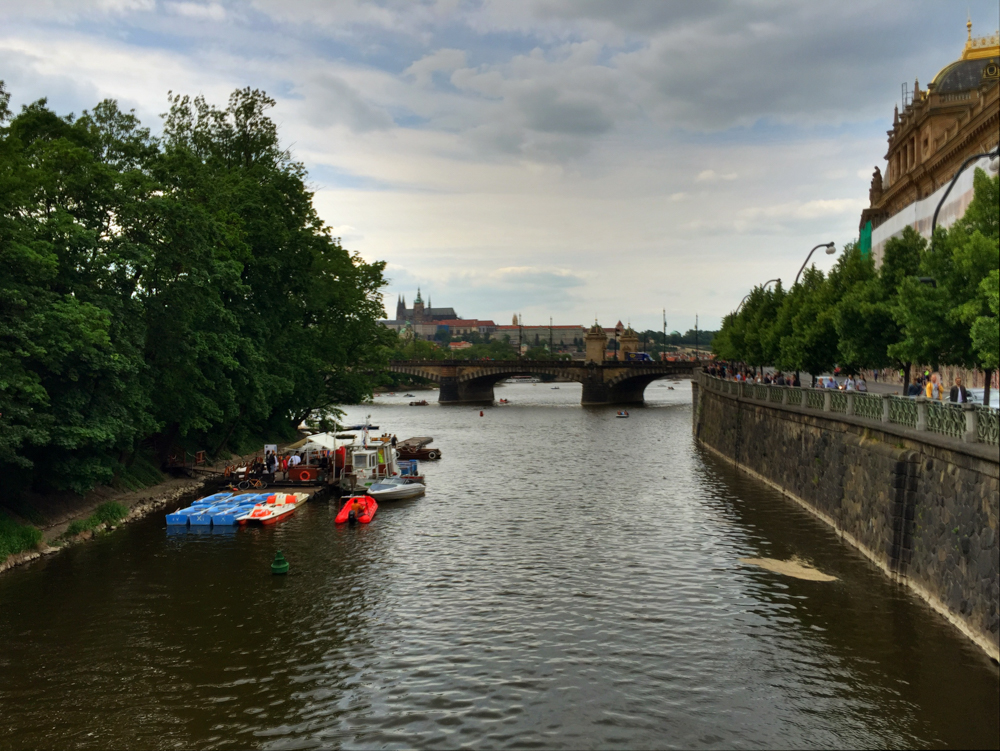
You have probably noticed the abbreviation HDR at you iPhone 6 camera app. But: try to avoid it, it simply does not give great results. Instead of it, invest couple of dollar and buy one more app. My favorite one is Pro HDR X (for iPhone 6) or Pro HDR (for older iPhone models).
Why particularly this one? Because it seemed to me to be the best choice of several I tested – and results are really great. It is very easy – just activate the app a press the shutter release. Camera will do very quickly three photos and combine them onto one. The results are often quite good, but you can easily adjust them with several additional sliders and make it shine even more.
Just one more point: it is not a “Instagram” sort of thing, although it often tempts users to overdo the adjustments and create a wild picture full of saturated colours. That’s wrong approach – the mission of HDR is different: to help recreate reality at moments when technical limits of the camera prevents us from achieving it. So no wild colours, please!
Retouching iPhone 6 photos? Yes! But…
How much should I retouch iPhone photos? Well, that’s a sort of philosophical question. We can summarise it into two simple points (which apply pretty much to any photography):
1. Do not over-do retouching: try to keep the golden rule to get the best possible quality directly in you iPhone. Because, yes, retouching can help, but its primary goal is to make a great photo even better. Not to make a sort of good photo from an ordinary/boring one. Do try to avoid what many you friends and colleagues say: “Well, the original photos are just so boring, so it takes me many steps in retouching software to make it bit more attractive.” This is simply wrong way – average shot will always be average shot – even the wildest retouching will not change it.
2. You must retouch! Are you bit confused? Isn’t the second point denying the first one? Not at all. You simply have to retouch. You have to be very careful, decent, yet you simply have to. Why? Because a subtle retouch is often the only chance how to make a boring scenery at least partly attractive (so it gets noticed at your friends Facebook’s Timeline, for instance).

Well, you just cannot live nowadays without certain knowledge of retouching tricks. Basically, you have two options. First one: use default iPhone camera. It has many quite useful tool, well, many more than you actually need.
You can adjust exposure, contrast and many more key features… Or you can experiment with preset filters attempting to improve the photo with several methods at once.
But my advice is quite straightforward: do not lose you time with this and jump into the option two right away…
Second option to retouch iPhone 6 photos is… Instagram.
Wait a minute, you might be saying right now, Instagram is a social network and its main mission is to share you pictures with your friends (or people you do not know at all).
Yes, it is – but I just love it “hidden” functionality – to use it for great quick retouching WITHOUT sharing…
Still confused? I will explain. Instagram is actually very sophisticated tool… yes, it is easy and simple, but still sophisticated to the extent that if can fix most issues of common smartphone photography (saturation, contrast, etc), and forget the “wild and super-artificial” filters, they are pointless anyway…
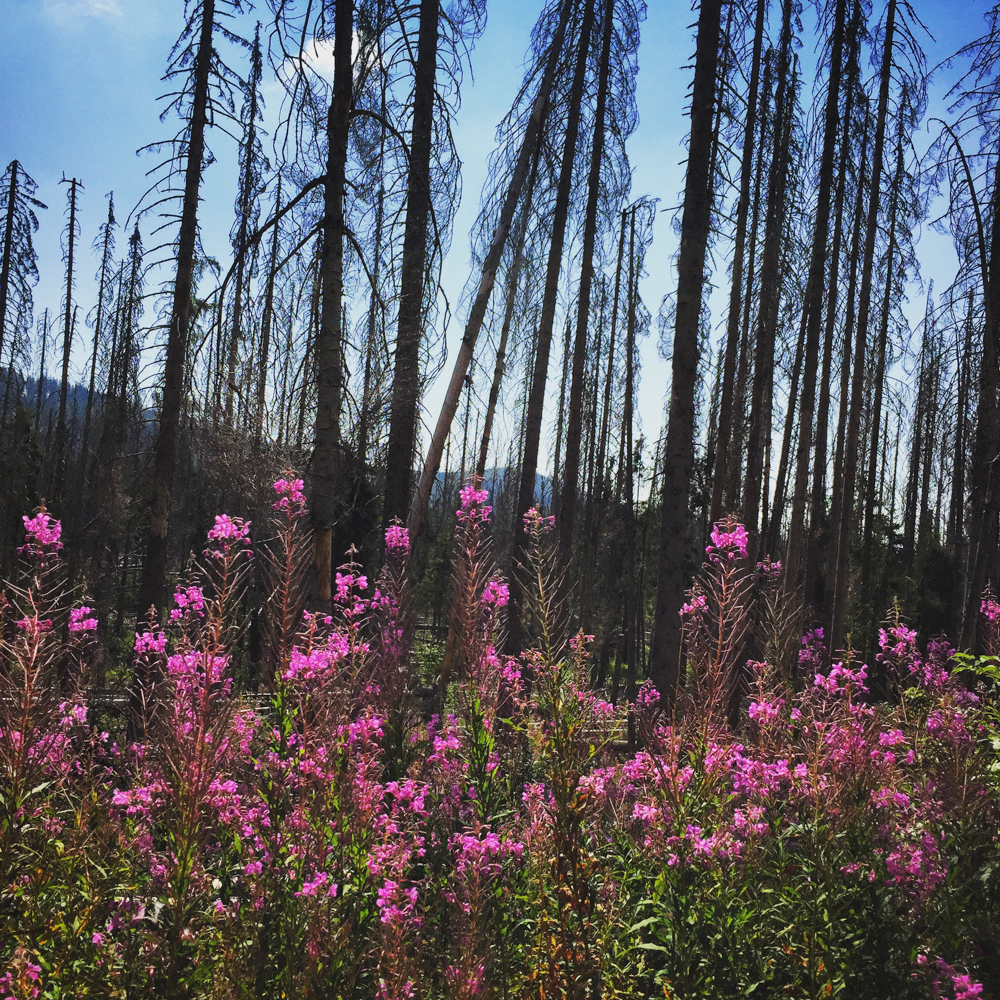
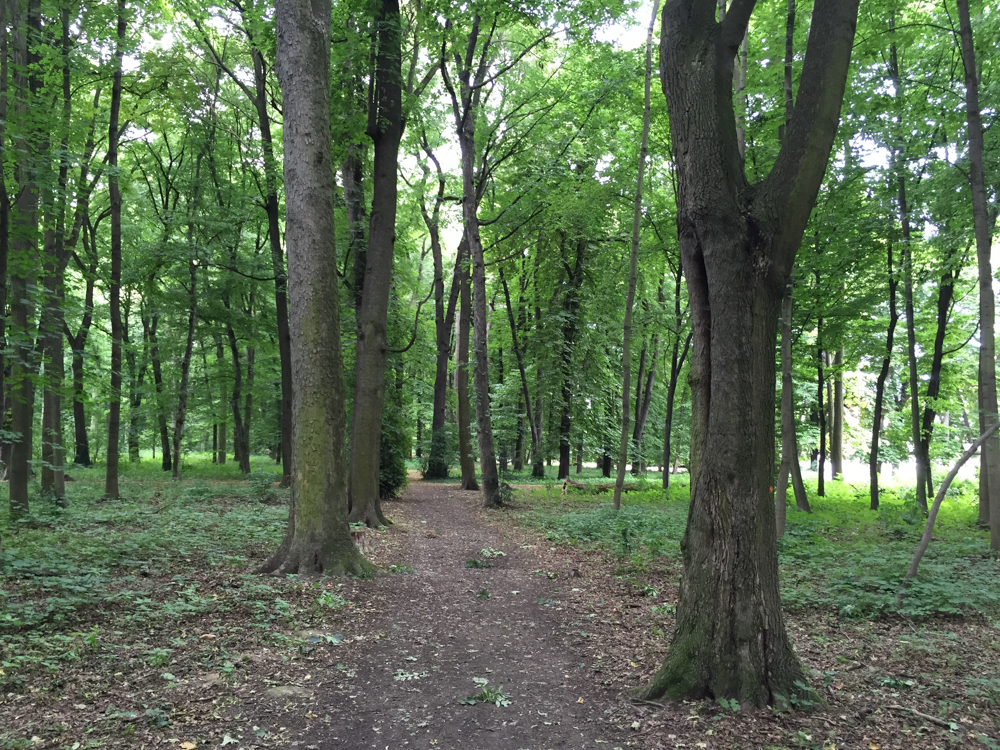
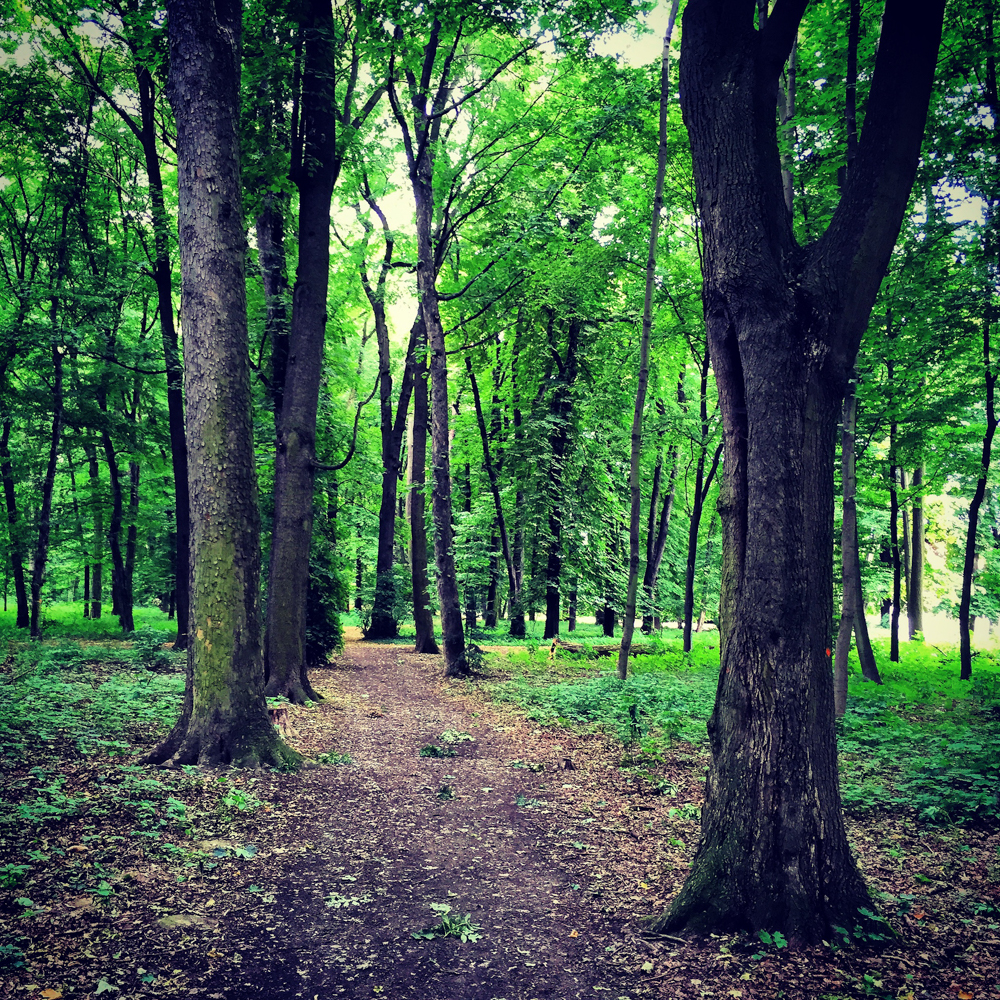
Let me sum it up in a very easy way: Instagram is a great way how to make dull photo much more attractive. Just see the simple example – an iPhone 6 photo of a forest path from an afternoon walk. Light was rather boring, so even the best photographers of the world just had no chance of doing something above the average.
So a retouch is the only way to bring home something more or less interesting. And Instagram is a perfect way of achieving it. The photo as such will still be average. But it will not go unnoticed on, say, Facebook which matters more a more.
One important detail: how to retouch on Instagram without sharing? Instagram is a tool created for sharing photos, so it is not meant to be just a retouching software. So there is not direct way to use its retouching features without sharing it to its network. Still, there is an easy workaround. Just try this: before the very last step (when you upload the photo to the Instagram stream), switch the iPhone 6 to flight mode and hit “enter”… Instagram will protest, claiming the process failed. But: by then the retouched photo will be saved alongside your original photo in your camera’s root folder. Here we go!
Future of photos of your iPhone 6? Google Photos
If you ask me, what I consider to be the most revolutionary photo milestone of recent months and years, my answer might sound bit boring: Google Photos. Why? Because this piece of software changes some long established logics of photography.
Google Photos, launched in May 2015, has taken over some key functionalities of Google+ – and it supercharges the ability of iPhones and any other smartphones to backup, sort and share photos. But it not the full story – I believe it could really change the way we store and search photos in general, since its – mostly overlooked – search abilities are fantastic, or creepy, if you want…
Sorting and backing is one of the toughest mission any photographer will face sooner or later. Sure, there is nothing new on automatic uploading of photos into cloud… there are many of possibilities, including Apple’s own solution, iCloud.
Google Photos do this in a very convenient way, I just love peace of mind, eg the fact the all my iPhone 6 photos sync to my Google account as soon as I am on a wifi.
Couple of points:

High Quality, or Original? Google offers you unlimited free storage – if you opt for “High Quality” option is Settings. “High Quality” does not, however, mean the highest possible one – in fact, Google reduces size of the file and compress it. It is a matter of discussion to which extent is this a serious problem. But I just do not want Google to do this – so I use the other option, “Original”, so Google does nothing, but the size of photos counts to your storage limit (and yes, it will not take long before you use all your free 15 GB…)… So think twice, before you make the selection…
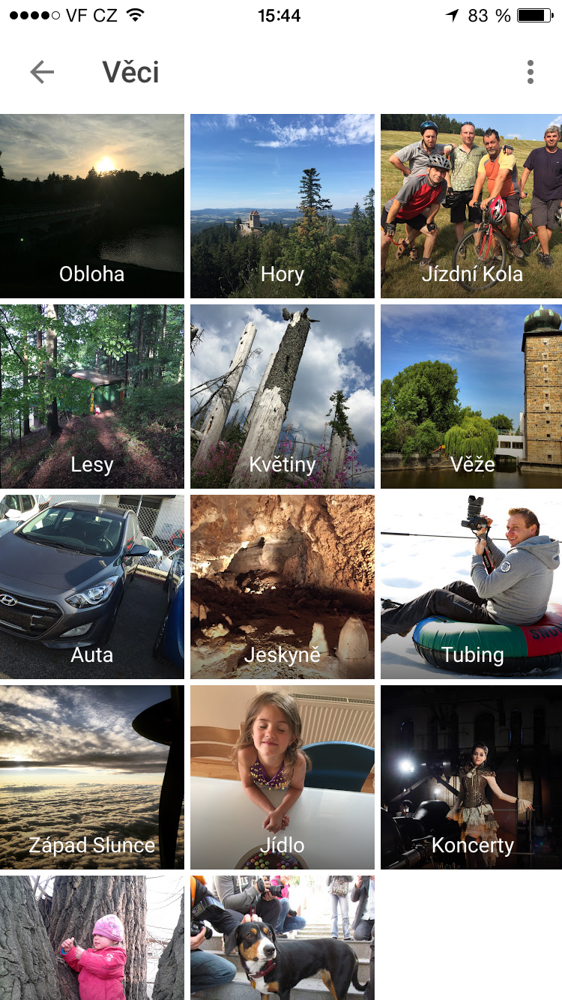
Fantastic/creepy search… What really makes Google Photos different from anything I have ever seen, is the search capabilities. If you never tried, just do it now… Again, it could easily be overlooked: just tap the blue search circe in the right bottom corner… It will take you to a space in which Google decides how to sort your photos.
Sure, nothing surprising on sorting along the geographical lines – it is easy. But check out Thinks – it is really able to produce incredible selections and define interesting sub-libraries. Right now, I have folders like “hiking, caves, food, sky, dogs” and much much more…. Amazing… and creepy, as I said… I just asked it to find Toyota, my new car… And yes, here we go, all photos from recent weeks… But none of them contains any keyword, so Google must have guessed it from the shape of the car. Or it used some other magic… Once again: Amazing!
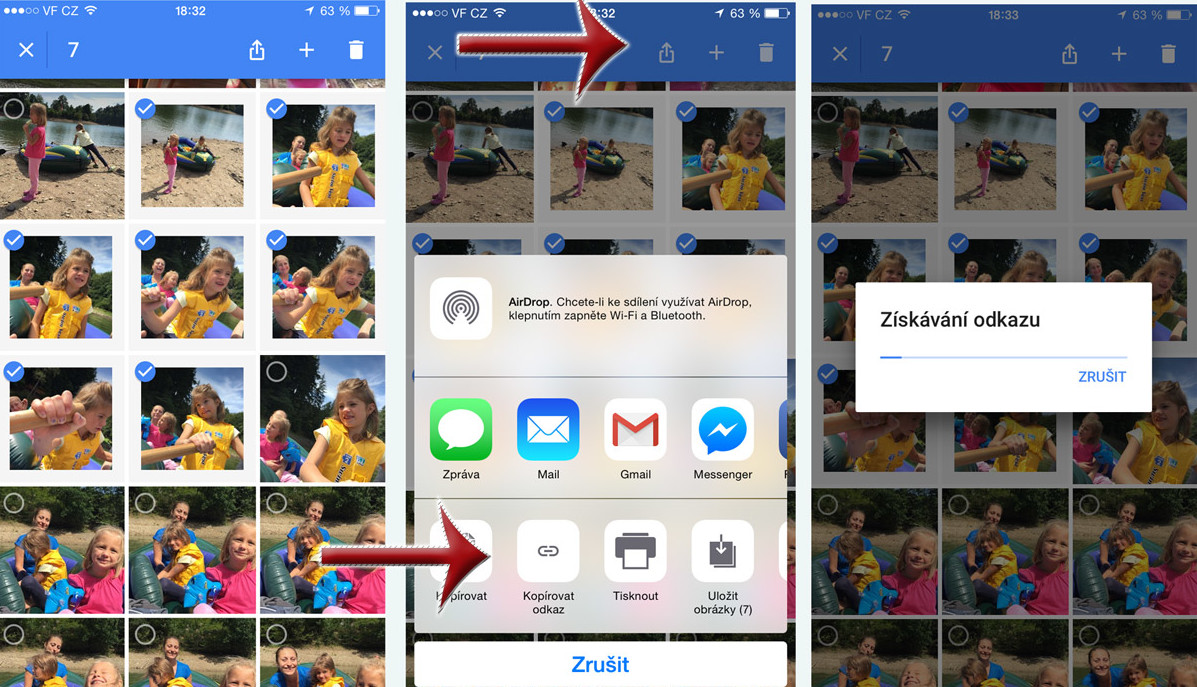
Cool and quick sharing. There is nothing special on sharing photos from you iPhone 6, you might say… There is so many options, how to do it… Sure, it is, but one native way of Google Photos is just incredibly handy – sharing via link. Again, it is easy: let us say you make 15 shot of kids in mountains and want to share, say, 10 of them… Just select them and ask Google Photos to generate link only for you selection. And that’s it. Once I got used to it, there is no way back for me…
Just remember: you might consider activating tool (in Settings) that would strip your photos off the geolocation datas. Again, it is quite useful feature, since you like the idea of sharing photos, but not necessary with detailed information of where they were taken.
After several months, Google Photos is a fantastic tool (I did not mention its nice ability to do nice short video clips from your stuff), and even if do not care much about software improvements, I am really looking for Google giving its photos new features.
So, that’s it! Now take your iPhone 6 and start shooting… Good luck!
—-
[social-bio]


Leave a Reply